Friday, September 10, 2010

The Wall

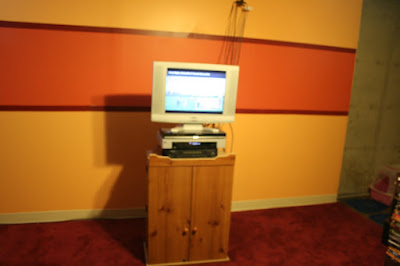
After staring at my ugly blank wall behind the TV for over a year, I decided to finally paint it. I had color chips taped all over the wall, did a lot of research on painting techniques, and watched a lot of HGTV trying to decide the best approach. Then I saw on display at Walmart a couple "fall" colors from Dutch Boy. I grabbed the paint chips and taped those to the wall. I immediately fell in love with the colors. I got the idea for a big bold stripe horizontally through the middle from the Parade of Homes a couple weeks ago. Mind you, this is the first time I've gone BOLD on a wall. I really, really love it!

COLORS:
light upper and lower: Dutch Boy OR36, Mystic Nectar
medium middle stripe: Dutch Boy BHG418, Mango Mania (featured in BHG Magazine Sep 2010)
dark small stripes: Kilz Casual 618, Red Fox (only chip I could find that matched my carpet)
Before the dark stripes:
I had the dark chip on the wall while the paint was drying to make sure I liked it. Imagine my whole wall the color of that dirty white on the right. UHGGGG!
After the dark strip. I like how everything ties in together with my carpet.
Closeup of the Wall. I still have some touchup painting to do, like making the edges more crisp with a liner brush.
It's beginning to look like the sports bar I never invisioned (but I LOVE it!!)
Next (hopefully) I'll be installing a wet bar complete with countertops, wall cabinets, and storage on the back wall (where the dart board is). I'd hate to let go of Dad's old portable bar, but it's taking up way too much space.
Until my next project,
Jawa Jaka (happily watching the wall, not the TV, LOL)

Tuesday, June 8, 2010

A New Red Roof!

Maybe I should call my place "The Red Roof Inn"! My new roof was put in yesterday, it's Owen's Corning (the Pink Panther company) Terra Cotta. Cats went through the roof when they heard all the noise!


The old roof, kind of a yucky brownish tan.


The new red terra cotta roof!


Makes the front door really pop! And blends in with the rest of the house.


Also got my porch swing up, surrounded by a few choice pots.


Fritz and Smokey lounging on the back porch, checking things out.


The practically dead rose bush is in bloom. Summer is definitely here!


Until next time,
Jawa Jaka, at the Red Roof Inn

Saturday, June 5, 2010

The cat's meow!

So, after five weeks of intensive labor on the front patio, I decided to tackle this short project. Took about five hours. I've had some self-adhesive laminate tiles just thrown on the ground under the litter boxes. A box of thirty tiles cost me $5 at Goodwill, one of my great finds. Without peeling the backing off, the tiles have just been sitting on the floor gathering dust and litter under and in between them. Tired of picking up the tiles to sweep, I thought it was about time to lay them on the floor under the stairwell correctly. It's not a perfect job but does look nicer (and no more picking up tiles to sweep!).

First, you need this product for bare concrete floors to make the adhesive on the tiles stick better. Apply this product liberally after cleaning and scrubbing the concrete first.

Lay out the tiles on a grid after the primer is dried. The milky white substance is the primer, and I had to stop for 30 minutes at this point to let the rest dry.

Close up shot of the tile. Colors are pretty accurate here: dark tan/camel with strands of mocha, light grey, and a hint of forest green and burgundy.

Litter boxes all in a row on their new tile floor.
And directly under the stairs is the rest of the cat supplies, along with boxes of empty CD holders and video tapes (just for storage).
Until next time,
Jawa Jaka, just finishing another project on my day off.

Wednesday, June 2, 2010

Phase 2 The Patio is Finished!

After five weeks of hard labor (and a couple months before that of planning), I now have a front patio I can be proud of. Tomorrow I'll put together the porch swing. By Friday I'll be sipping lemonade on my new porch. Awe, summertime is finally here....
Tools of the trade: a prong to clean out the leaves and tamp the polymer sand between the stones, a trowel to shovel small amounts of sand between the stones, a good clean stiff brush to wipe off excess sand, and the polymer sand itself. You'll also need a mist sprayer on a garden hose to wet the sand as per instructions on the bucket (follow instructions carefully!).
The brand of polymeric sand I used. It's not mortar but some kind of binding material mixed with very fine sand to make a pseudo mortar. It seems very strong so far (no stones moving yet).
Close up view of the polymer sand in between.
The finished patio, still wet from misting the polymer sand.
View from the front door.
I even dug in a flagstone shelf for my first potted plant (verbenas). Red, white, and blue all the way.
Of course, it's not really finished until kitty tested and approved. OK, Smokey definitely likes it, brick pavers aren't moving, so now it's finished!
And where was Fritz? Stalking a squirrel, of course!
Until next time,
Jawa Jaka
enjoying a warm Colorado summer day on her new front porch!

Sunday, May 30, 2010

Front Patio Update

Well, I'm almost finished. Just need to clean out the leaves between the stones and pour in the paver set. I think I have one stone to level, but all the other stones feel pretty good underfoot. There is a slight slope downward from the house wall for rain runoff. I also put some heavy but pretty small boulders/rocks around the sewer access pipe and in front of the stepping stones to hold the sand better. I even dug in a flagstone "shelf" for my terra cotta pot that I'll fill with pretty flowers. I'll have my porch swing up by Friday, just in time for the beautiful summer evenings (sans wind, I hope).


Alot of hard work this past month, but my Smokey and I are close to enjoying our new front porch soon (she loves to sit on my lap on the front stoop and watch the neighbors' kids on their bikes).

Until next time,
Jawa Jaka (impatiently waiting for my porch swing)

Wednesday, May 5, 2010

The Front Patio

I've been doing a little project on my own the last couple weeks. Working on it a couple hours each day, I've gotten quite a bit done. I should be finished by next week. Mind you, this is not easy work, but with free flagstone from a friend, very cheap sand ($1.88 per bag for 25 bags of 50lb play/mortar sand), and beautiful pavers than form a curve ($1.90 per paver for 30 pavers, got five free), the back-breaking do-it-yourself work is worth it. Here's where I'm at so far.

What it looked like before. Just a bunch of rocks.

Diggin out the rocks, making a shape, and laying the first layer of pavers. Had to dig in that layer so it would be even. Leveler is an absolute essential tool for this project.

Front view to show the curve of the pavers. Not bad, huh?

The Sandbox, or a very large neighborhood kitty litter box (lots of kitty footprints all over it!). 25 bags of Quicrete Play Sand gave me about a 2" layer, perfect for the flagstone.

Lots of raking to spread it out.

Closeup of sand.
The Jigsaw Puzzle. After spending a couple hours breaking my back watering and tamping down the sand, I grabbed a few pieces of flagstone to see how it would all fit together. Bigger pieces are toward the wall.
Closeup of piece fitting. Much harder than piecing together my Imperial Officer tunic!
I did find a couple pieces that had a curve to it that fit against the pavers nicely.
Next is continuing with the jigsaw, leveling the sand, installing the pieces, and mortar the joints with Paver Set (sand with polymer fill to make airtight joints). And more tamping to do. Kittys won't have a chance when I'm done.
Until next time,
Jawa Jaka

Monday, May 3, 2010

The Walkway

I've been a busy bee on the house lately now that spring is here. A few months ago the sewer pipe clogged up so bad that the sewer company had to dig up my pipe, bend it straight, reinforce it, and cover it all back up. Of course, it got covered with bare dirt. Aurora didn't like that (no bare dirt in front lawns). Ridiculous law since they won't let us water our lawns, and the city made me dig up the sewer pipe ($8000 I feel the city owes me!). So, I left it bare for awhile, daring them to give me a ticket. Then last month I felt the need to do yard work, in a blizzard, just because it was April, and snowing...

So, this is the photo log of the flagstone Walkway, from the street to kinda near my front door. Mind you, I have a sloping yard. Laying flagstone to be even on uneven ground is pretty tricky, but I did it!
Digging in the edging.

Laying the flagstone (the same stuff I'll use on the patio).

Flagstone and edging dug in and level steps (well, one more edging to go, but it is in).
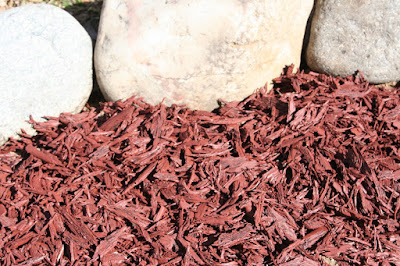
Putting in the rubber mulch (it's been through two heavy wind/sand storms and two blizzards, and still hasn't blown away).
Rubber mulch looks like the real thing! Also, lined the last couple feet at the street with small boulders that were laying around in the side yard.
Finished! Looking from street to house. Big red boulder on left side is now sitting next to new patio (next blog).
Until next time,
Jawa Jaka (now a full-fledged 501st member, DZ 5905)